Good news: you did it! You finally found the classic car for which you’ve been searching. And you did it right. You put in the research time, you didn’t get “buck fever” the first time you found a decent example for sale, and you paid a price with which you can live. Now you can relax… for a few days, anyway. Then it’s time to get to work, because the day you brought that classic car home marks the start of the work, not the end of it. Classic car repairs after buying are normal, and they tend to come from the same short list on almost every car. Most classic cars will need a few predictable repairs and maintenance items during their first twelve months in your garage. This is because you are often buying a car that has sat idle for long stretches, a car with thin service records, or a car where the previous owner simply stopped spending money in the run-up to selling it. If you need a comprehensive overview of ownership habits like storage, finding a local mechanic, and joining the community, check out our broader checklist for new classic car owners. If you’re ready to get to work, however, let’s focus on some specifics. We are going to walk through the common classic car repairs that nearly every new owner faces. The short version: brakes, tires, and steering first, then fuel, ignition, cooling, and fluids, then whatever the last owner left undone. We’ll be explaining what to check, why it matters, and when you might want to call in a professional.
Why Year One Is Different
Rubber, fluids, and fuel all age even when a car is not driven, so “low mileage” on a classic doesn’t usually mean “low maintenance”. Unless you have a stack of recent receipts to the contrary, you should treat every single maintenance item as an unknown and establish your own baseline. Enthusiasts refer to this shakedown period as “sorting” a classic car. It is the process of finding and fixing all the small things a new-to-you vehicle needs before it is truly reliable. Approaching year one as a sorting phase helps you view the inevitable quirks as a planned project rather than a frustrating surprise. It’s also a great way to get to know your new classic from the inside out.
The First-Year Fixes: Stop Safely
When it comes to common classic car repairs, always start with safety. The car must be able to stop and steer before you ever worry about how well it runs. Do these tasks before attempting any real driving.
Brake Fluid Flush and Bleed
Most brake fluid, including the common glycol-based DOT 3, DOT 4, and DOT 5.1 types, absorbs moisture over time (silicone DOT 5 is the exception). This trapped moisture corrodes internal parts like master cylinders and metal lines, and it significantly lowers the boiling point of the fluid. (That matters because boiled fluid forms vapor bubbles in the system, leading to the dreaded “long brake pedal” when you’re trying to stop.) On a car with an unknown maintenance history, flushing the old fluid and bleeding the system should be your very first mechanical task. The process of bleeding brakes on a classic car ensures you remove trapped air and old contaminated fluid, giving you a firm pedal and reliable stopping power. While professional shops in a hurry will often use a vacuum bleeder, the gold standard here is to get a bleeder bottle, the right wrench, and a patient partner. If your classic has ABS (crazy, right? But electronic four-wheel ABS first reached production cars in the early 1970s) then do some research to see what you’ll need in terms of scan tools or specialized equipment to bleed the ABS block.
Rubber Brake Hoses, Wheel Cylinders, and Calipers
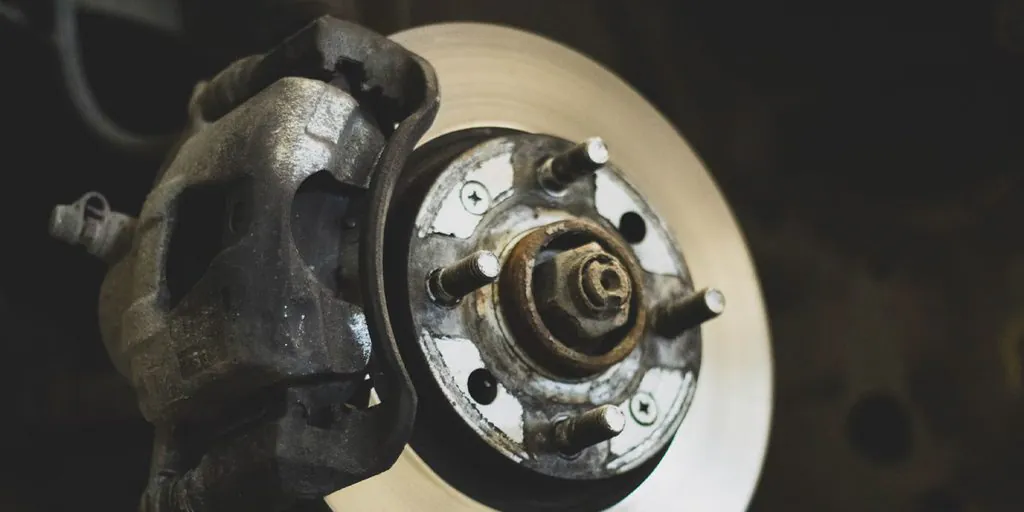
Flexible rubber brake lines dry out, crack, and swell internally as they age. A hose that looks fine on the outside might be collapsing on the inside, causing your brakes to drag. Sticky calipers and weeping wheel cylinders are classic problems for cars that have sat too long. You need to pull all four wheels, remove the brake drums, and look for damp spots or heavy corrosion. If you see signs of leaking fluid around the wheel cylinders or cracked rubber on the hoses, replace them immediately.
Tires by Date Code, Not Tread
Your tires can look absolutely perfect and still be dangerously old. Old rubber gets hard, losing its grip and becoming prone to sudden blowouts at highway speeds. You’ll want to find the DOT date code stamped on the sidewall to know the true age of the rubber. On tires made since 2000, the last four digits of this code tell you the week and year the tire was manufactured. Many tire specialists and safety experts recommend replacing tires somewhere in the six-to-ten-year range regardless of how much tread is left. Some tires, especially the early “soft compounds” fitted to Nineties sports cars, might need a more frequent replacement than that, so don’t be afraid to contact a reliable retailer or the manufacturer themselves.
Steering and Suspension Wear
Loose steering is a critical safety issue, not just a minor comfort problem. Worn rubber bushings, loose tie rod ends, aging ball joints, and tired wheel bearings make a car wander all over the road. While you have the wheels off for your brake inspection, check the suspension for excessive play. Repacking dry wheel bearings with fresh grease is a cheap and (usually) easy job that prevents catastrophic failure on the road. If the suspension feels sloppy, hand it to an alignment specialist or replace the worn components yourself before doing any high-speed cruising.
Just brought a classic home? Protect what you paid before the first repair bill arrives. Get a free quote on Agreed Value coverage from American Collectors in about two minutes.
The First-Year Fixes: Keep It Running
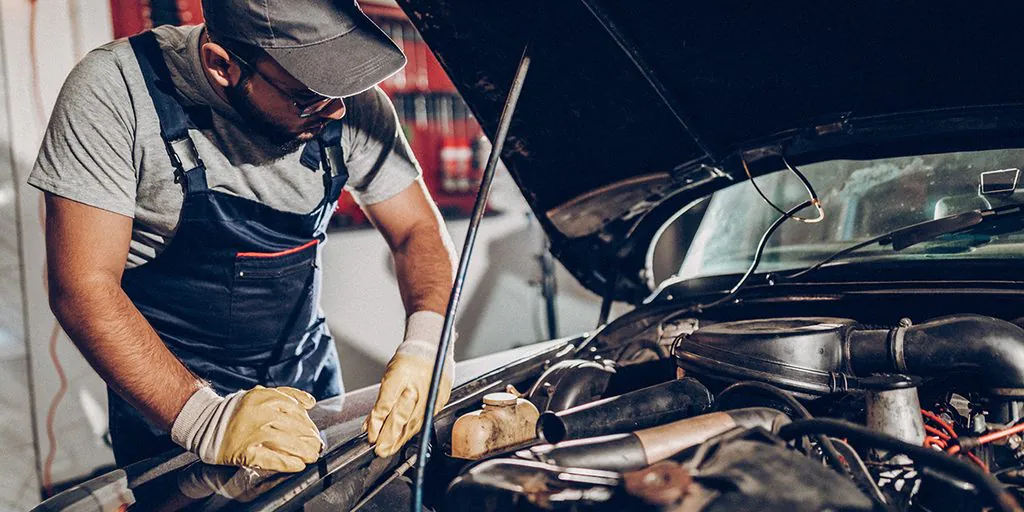
Once the car can stop safely, your next priority is making sure it starts and runs reliably. This group of repairs focuses on the core systems under the hood.
Fuel System Clean-Out
Modern fuel blended with ethanol breaks down old rubber lines and leaves varnish inside carburetors. Stale fuel and sediment in the gas tank are among the most common reasons a newly purchased classic runs poorly or leaves you stranded on the side of the road. Inspect all rubber fuel lines from the tank to the carburetor and replace them with modern ethanol-resistant hose. You may also need to drop and clean the fuel tank or rebuild the carburetor if the car has been sitting for years. Some additives, like SeaFoam or Techron, can make a real difference, but they won’t magically empty sediment from a gas tank.
Ignition Tune-Up
A proper classic car tune-up is essential for smooth running. This includes replacing spark plugs, plug wires, the distributor cap, and the rotor. For cars that still use them, you will need to inspect and possibly replace the contact points and condenser, and then properly set the ignition timing. Some owners choose to convert their vintage distributors to modern electronic ignition systems for better reliability and less maintenance. This is a personal call regarding originality, but it is a very common upgrade during the first year of ownership.
Cooling System Refresh
Overheating is one of the most frequent complaints during a new owner’s first summer of driving. Coolant hoses can look perfectly fine on the outside while rotting from the inside out. You should plan on inspecting and/or replacing the upper and lower radiator hoses, heater hoses, engine belts, the thermostat, and the radiator cap. Follow this up with a complete coolant flush. A clean cooling system is cheap insurance against a warped cylinder head or a ruined engine.
Baseline Fluids and Filters
Do not assume any fluids are fresh. Change the engine oil and filter, the transmission fluid, the differential gear oil, and the power steering fluid right away. Doing this baseline service means you know exactly what fluids are in the car and exactly when they were changed. This gives you peace of mind and a clean starting point for your future maintenance schedule. (Don’t forget to write down what you did, along with the date and mileage.)
Battery, Cables, and Grounds
Many mysterious electrical gremlins on older cars trace directly back to a tired battery, corroded terminals, or poor ground connections. A weak ground can cause everything from dim headlights to an engine that refuses to crank. Clean the battery posts, inspect the heavy copper battery cables for internal corrosion, and ensure the engine block and chassis have clean, bare-metal ground connections. This isn’t a bad time to learn how to really use a multimeter, by the way.
The First-Year Fixes: Undo the Last Owner’s Shortcuts
Almost every older classic comes with a few questionable repairs from its past. Finding and fixing these issues can be a hassle, but you’ll have more confidence when you head out for a long drive.
Found your next collector car? Protect it in minutes.
No depreciation, no surprises. ACI's agreed value coverage gives you the full amount you insured it for.
Deferred Maintenance You Inherit
When an owner decides to sell a car, they often stop spending money on it. This creates a backlog of minor repairs that you now have to handle. Classic car deferred maintenance might include worn shock absorbers, squeaking alternator belts, or a sticking choke. The best approach is to carefully inspect the car top to bottom, note every flaw you find, and build a punch list. Don’t let that list daunt or deter you; every item you check off will result in a happier drive.
Amateur Wiring and Quick Fixes
Over the decades, many classics fall victim to careless electrical work. You will likely find spliced wires held together with electrical tape, mystery toggle switches under the dashboard, and add-on accessories that were never wired with proper fuses. This type of amateur wiring is a massive fire risk. Trace any aftermarket wiring to ensure it is safe. If you find a tangled nest of twisted wires under the dash, it is well worth having an automotive electrical specialist look at it before it leaves you stranded or causes a fire. Signs that a car has been rewired after it left the factory include an aftermarket stereo, radar detector power plugs, and any “pro touring” components like a digital dash or significantly upgraded lighting. Some Japanese cars from the Seventies through Nineties used dealer-installed wiring kits for stereos and even air conditioning, so be aware of that as well.
Leaks and Tired Gaskets
Old cork and paper gaskets shrink and leak over time. Do a bit of research to find out which drips are considered normal for your specific make and which ones demand immediate attention. An engine rear main seal that leaves a single drop of oil might be tolerable, but a leaking water pump or a dripping brake master cylinder is a critical failure. Fixing bad seals early protects your paint, your rubber suspension components, and your garage floor.
The First-Year Fixes: Later in Year One
Once the car stops safely, goes reliably, and stays cool in traffic, you can move on to the fun stuff.
Comfort and Convenience Items
Now is the time to fix the heater blower motor, replace the cracked weatherstripping around the doors, or get the dashboard gauges reading accurately. Upgrading headlights and replacing sluggish windshield wiper blades will make evening drives much safer and more enjoyable. (Feeling generous? Document those changes, especially if they involve rewiring the car, so if you sell the vehicle the next owner will have less detective work to do.)
Cosmetic Work
It is incredibly tempting to start polishing chrome or buying new seat covers on day one. Hold off on all cosmetic work until the mechanical fix list is entirely finished. A beautiful car that breaks down at every intersection is no fun to own. Keep your focus under the hood first, and save the detailing and aesthetic upgrades for later in the year.
What to Fix First on a Classic Car, and How to Budget for Year One
Knowing exactly what to fix first on a classic car keeps you from getting overwhelmed. The order of operations should always be strict. Make it stop safely, then make it run reliably, then ensure it stays cool. Safety items are your first priority, mechanical reliability is second, preservation is third, and cosmetic upgrades are always last.
To stay organized, keep a running fix list sorted into three distinct categories. Label them “Before I drive it”, “This season”, and “This winter”. By doing that, you’ll break a massive restoration project down into manageable weekend tasks.
You should also set aside a dedicated first-year repair fund on top of your initial purchase price. If you’re not sure how serious that fund should be, ask existing owners (and read up on the hidden costs of classic car ownership). That goes double for affordable collector cars, where a lower purchase price often means more deferred work. Save every single receipt for the parts you buy and the labor costs you incur. Documentation adds real value to the vehicle and proves to future buyers that the car was properly maintained. Our Beginner’s Guide covers record keeping in more depth.
Common Classic Car Repairs: Frequently Asked Questions
What should I fix first after buying a classic car?
Always address safety items before anything else. Your very first tasks should be flushing the brake fluid, inspecting all brake hoses and wheel cylinders, checking tire date codes, and verifying that the steering and suspension components are tight.
How much should I budget for repairs in the first year of owning a classic car?
The exact amount varies wildly by make and condition, but you should always set aside a dedicated repair fund on top of the purchase price. When deciding how much to budget for classic car repairs, price the safety items first, then add a cushion for what you find once the wheels come off. Expect to spend money immediately on baseline fluids, a tune-up, safety inspections, and undoing the previous owner’s deferred maintenance.
How old is too old for classic car tires?
In almost every case, yes. Establishing a baseline is critical. Unless you have explicit receipt proof of a recent change, you should drain and replace the engine oil, coolant, brake fluid, transmission fluid, and differential oil so you know the car is protected.
Do I need to change all the fluids on a classic car I just bought?
In almost every case, yes. Establishing a baseline is critical. Unless you have explicit receipt proof of a recent change, you should drain and replace the engine oil, coolant, brake fluid, transmission fluid, and differential oil so you know the car is protected.
Does classic car insurance cover mechanical repairs?
Normal wear, tear, and mechanical breakdowns are not what collector insurance is designed for. This is exactly why year-one sorting matters so much. A specialized policy is meant to protect the vehicle’s value in the event of an accident or total loss; repair and maintenance is always the responsibility of the owner.
Why This Is the Right Moment to Set Your Agreed Value
The first year of ownership is when your total financial investment climbs the fastest, factoring in the purchase price plus every brake job, tune-up, and tire set you buy. A standard auto policy typically pays out actual cash value, which factors in depreciation, while an Agreed Value coverage policy from American Collectors Insurance locks in what the car is actually worth. Because you are constantly improving the vehicle during this sorting phase, you should revisit that agreed number after any major mechanical work is completed to ensure your new investment is fully protected. (If this work will take a while, consider insuring a car while you work on it.)
Make It Right, Then Enjoy The Drive
A sorted classic always makes for a better experience. By tackling these common classic car repairs in the correct order, you eliminate the hidden risks and build a reliable cruiser. Work your fix list methodically, address the safety items immediately, and you will often find that your second year of ownership is mostly just driving and enjoying the open road. If you need a refresher on the lifestyle side of the hobby, revisit our broader checklist for new classic car owners for tips on storage and finding a marque-specific car club. Protect all the hard work you have put into your garage this year with a proper classic car insurance policy (get a free quote in about two minutes), and enjoy the drive.
Found your next collector car? Protect it in minutes.
No depreciation, no surprises. ACI's agreed value coverage gives you the full amount you insured it for.